It was built in Unity3D using C#.
GUI stands for Graphical User Interface and is pronounced “gooey.” This term was created in the 1970’s to distinguish text based user interfaces from those that contain windows, icons and buttons. Today almost all user interaction uses a GUI, from your computer to phone or tablet.
These icons and buttons that are clicked or touched are sending commands to the hardware instead of typing every command you need. If the interface you are using has graphical elements then you are using a GUI.
For the Kuaua Pueblo Dig game, we have decided to use a touch screen monitor to allow the users to move about the scene. This means the GUIs need to coincide with the correct layout and code to be controlled with a finger. This means the GUIs can not rely on multiple button input and there must be a button for every action that needs to be done.
One of the most important steps to designing a GUI is the “pen and paper” phase. The layout of the GUIs needs to be drawn first to make designing it on the computer much easier. It is also important to do this phase so that you will know how many GUIs are needed, what they will do and where they will send the user.

Once this step is satisfied, recreating the GUI layouts in unity is the next step. This can be a tedious process because everything depends on layers and settings.
- Setup “canvas” layer
- Attach it to the camera that will view it. There are many settings to play with until it is adjusted just right. This canvas will hold all of the GUI elements in view.
- Create “panel” layers. This panel layer will allow for background images or colors. Panels are important for grouping different interfaces together. A panel should hold a set of buttons. Another panel should be used to display text. The reason grouping different elements together is important practice is for controlling them with code. If the code needs to change the text in view but the buttons are in the same panel it might cause the buttons to change as well.
- Code the GUI. Depending on what needs to be done code will be created and attached to the GUI element so that it becomes interactable. Some examples in the Kuaua game are switching between GUIs, switching between scenes, exiting the game, showing information and controlling the camera view.
- DESIGN! This is the last step that needs to be done for the GUIs in the Kuaua game. Button images, titles and icons still need to be designed and then added to the GUIs. Right now I am using placeholder images that come with Unity until I create unique ones.
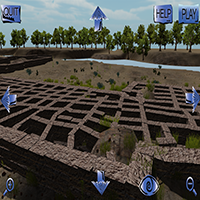
The following pictures are rough drafts of the GUIs in the game now. Everything in them will be replaced with unique images and designs created specifically for this project.


